any time FCStd sources are changed, the generated STL, STEP, DXF and other derivatives are no longer current. it makes more sense to post and tag the latter in releases. |
10 months ago | |
|---|---|---|
| assets | 2 years ago | |
| diyplus | 10 months ago | |
| fff | 10 months ago | |
| .gitattributes | 2 years ago | |
| .gitignore | 2 years ago | |
| README.md | 10 months ago | |
README.md
nakamochi 3D designs
the repo contains 3D models of parts used in the nakamochi project.
those design sources which are made with freecad use a version no older than v0.20. a stock installation of freecad should be sufficient but you might want to install fasteners workbench if working on a design assembly.
there are currently version kinds available, DIY (FFF) and DIY+, and possibly third upcoming PRO. all versions have generated files like STL, STEP and DXF, attached to their respective releases on https://git.qcode.ch/nakamochi/3d/releases
DIY version (FFF)
fused filament fabrication design is suitable for 3D printing at home, located in the fff directory. the main file is in fff/provcase.FCStd. "provcase" stands for "provisional case" because it was unclear at the time whether this would have been the final version.
the project contains all the parts to make a full assembly with the following BOM:
- raspberry pi 4 model b
- waveshare 4.3inch DSI LCD
- sandisk portable 1TB SSD sdssde30-1t00
- joi-it armor "block" heatsink
- 90 degree angle USB-C adapter 3.1 gen 2, 10Gbps
- adhesive gasket/seal tape for LCD, 1mm thick, 10mm width, L370mm
- 4 adhesive bottom pads
- 4 screws M2.5 L16-18mm for heatsink mount
- 4 spacers 2-4mm thick depending on the heatsink mount screws length
- 3D-printed enclosure main box (look for
box.stlin releases) - 3D-printed enclosure side cup (look for
sidecup.stlin releases)
all object constraints reference an embedded spreadsheet params to avoid
topological naming problem.
prefer constraining against datum objects instead of faces and other elements produced
directly from sketches like pads.
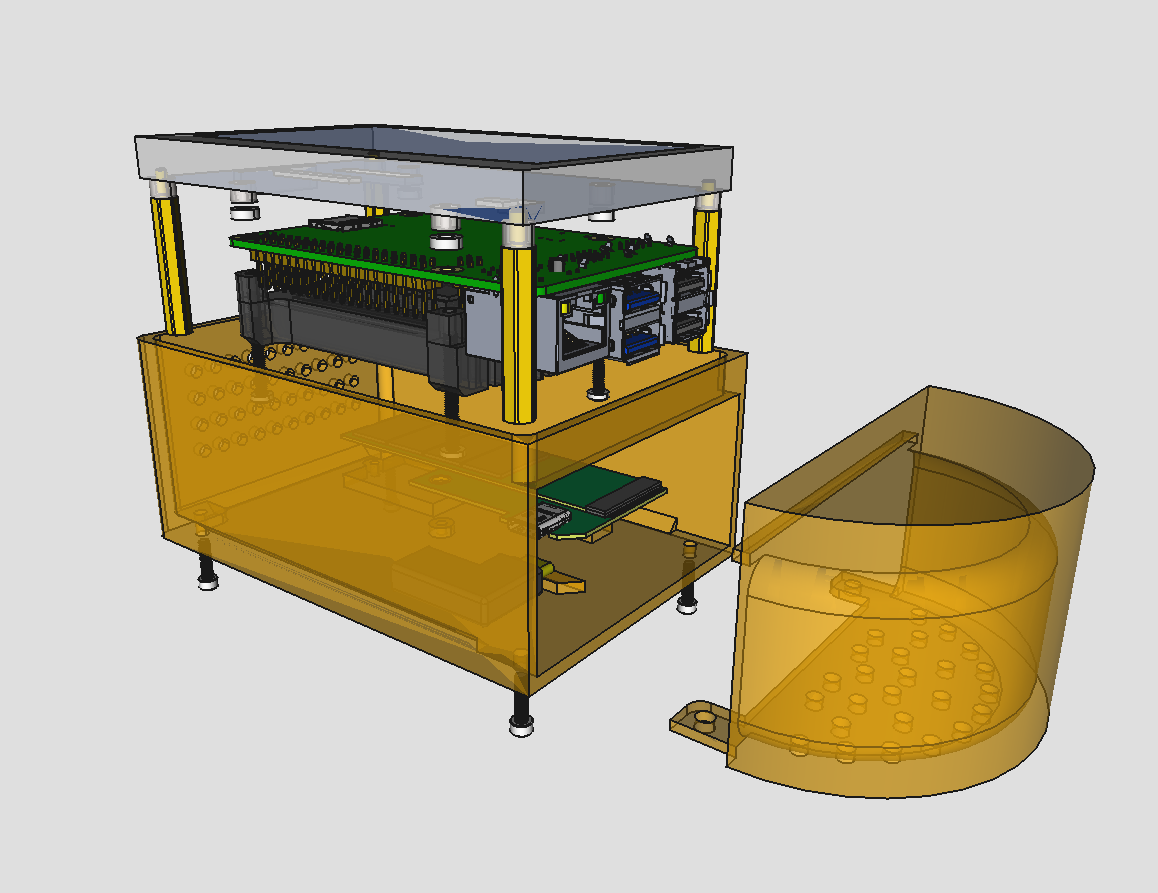
finally, the fff/provcase-assembly.FCStd file contains
an "assembly" group. this is simply a collection of parts composed together to help
visualize how and whether all of them fit well together. it links to the provcase.FCStd,
so you'll need both files. this assembly group calculates all placement offsets from
asmsheet spreadsheet. here's how the assembly looks like:
 |
 |
the "assembly" std part has a custom property "view" with two options: exploded and assembled. the property is configured from the same asmsheet.
3D printing the parts
TODO: insert here acceptable 3D printer specs and an assembly guide
DIY+ (plus)
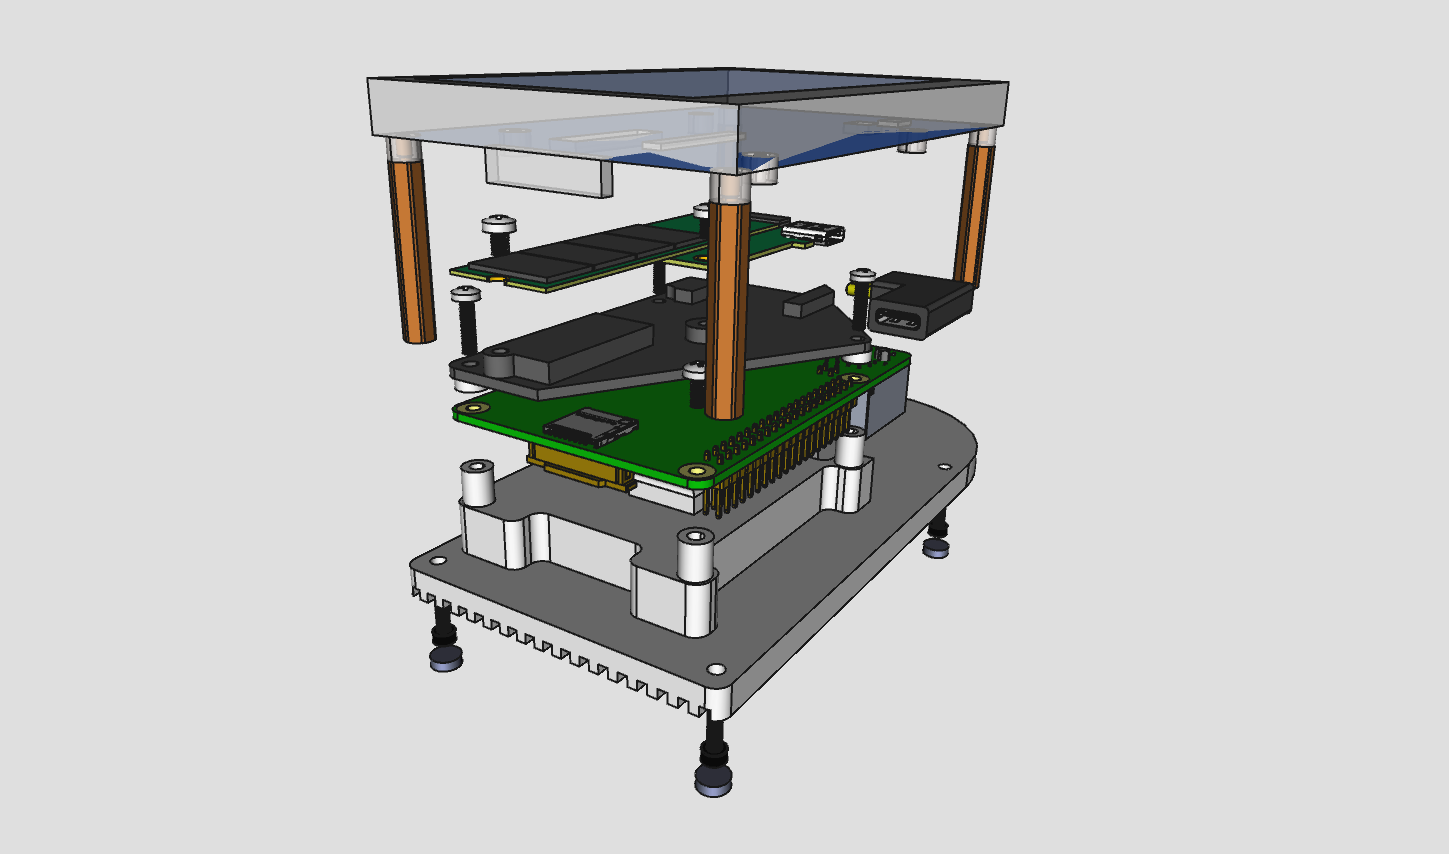
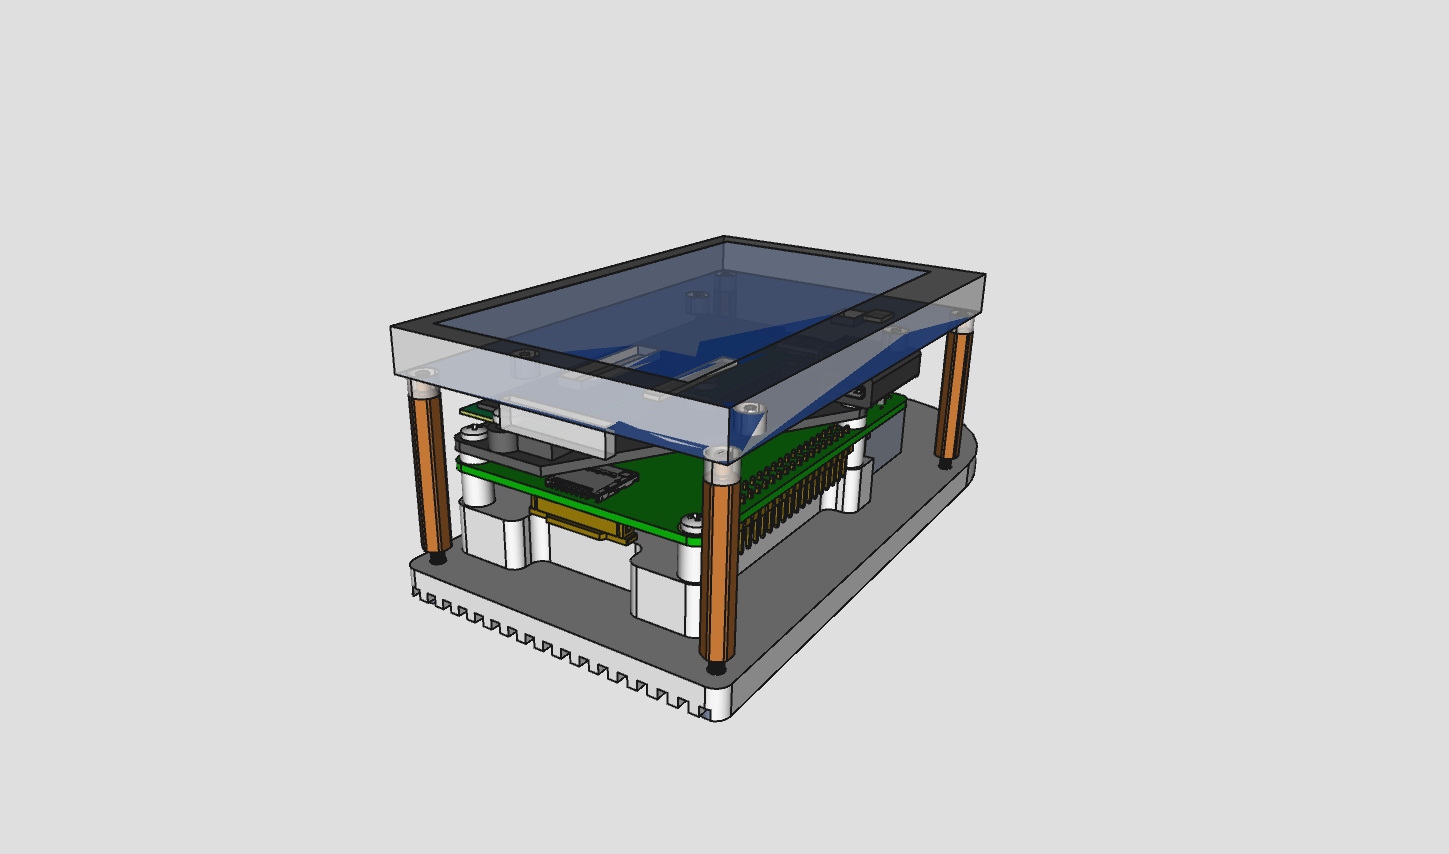
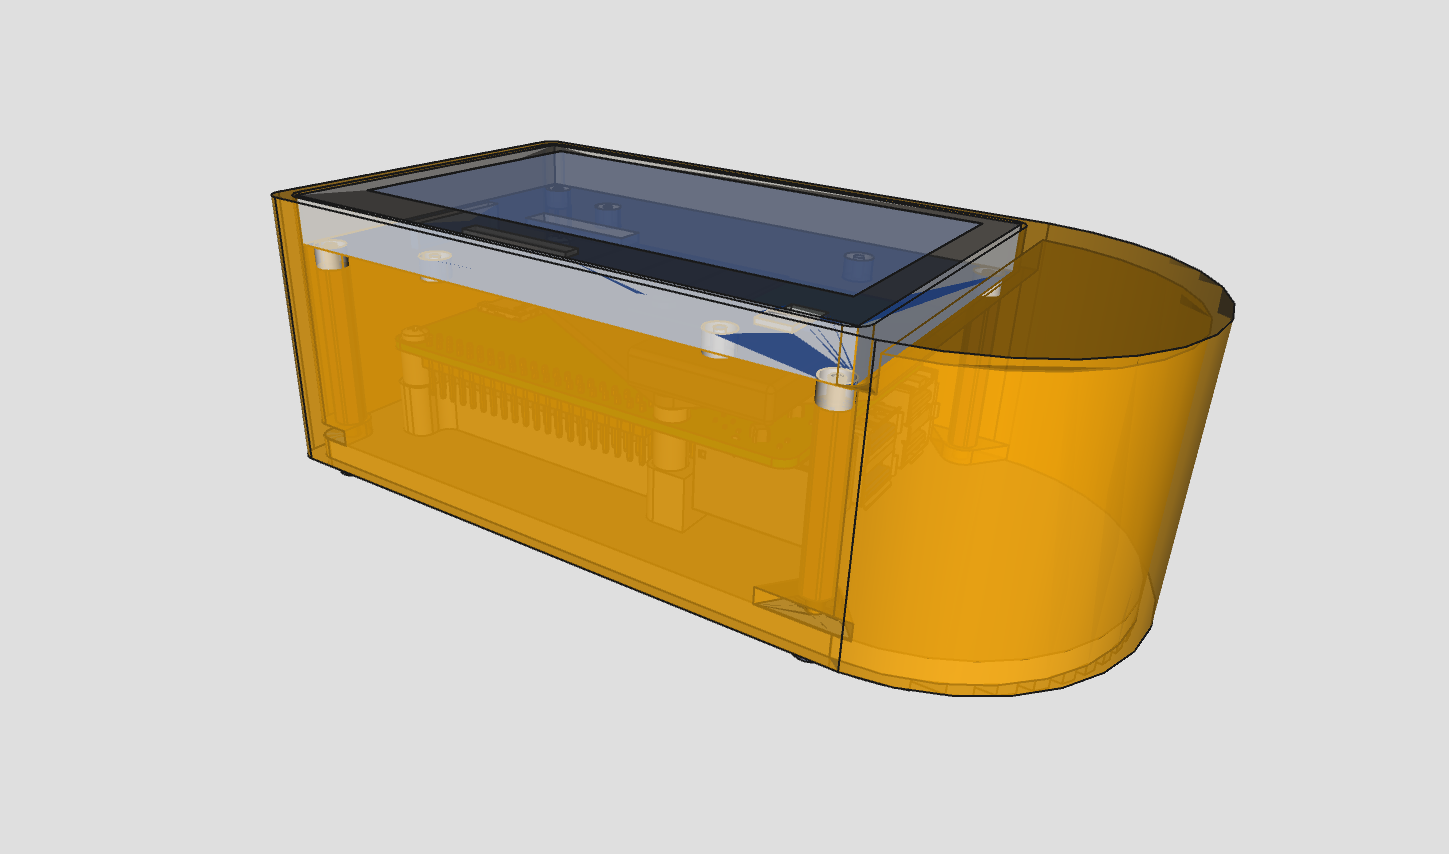
this version features a custom heatsink combined with the bottom plate, suitable for aluminium CNC milling. the construction provides a better heat dissipation compared to the DIY (FFF) version.
 |
 |
 |
 |
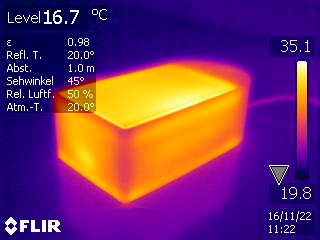 the baseplate serving as a heatsink brings down the main CPU temperature
from around 70℃ to 50℃. when measured externally while doing bitcoin initial
blocks download, an IR camera showed around 36℃.
the main file diyplus.FCStd contains all parts as well as the assembly. other files in the diyplus directory are exports from the main file, such as baseplate DXF, STL, STEP and drawings.
a complete assembly BOM is as follows.
off the shelf parts
- raspberry pi 4 model b
- waveshare 4.3inch DSI LCD
- sandisk portable 1TB SSD sdssde30-1t00
- 90 degree angle USB-C adapter 3.1 gen 2, 10Gbps
- adhesive gasket/seal tape for LCD, 1mm thick, 10mm width, L370mm
- 3 thermal pads 1.5mm thick, 424mm sq total area - see baseplate drawing
- 7 screws M2.5 L10mm
- 4 adhesive bottom pads Ø5mm, 3mm+ thick
other parts, harvested from the above list:
- 2 self-tapping screws 2.9mm L3mm (from the SSD)
- 1 screw M2.5 L5mm (from the LCD)
- 4 PCB standoffs M2.5 L30mm (from the LCD)
custom parts
- CNC milled aluminium baseplate (look for
baseplate_techdraw_c.pdfin releases) - 3D-printed enclosure box (look for
box.stlin releases) - 3D-printed SSD support plate (look for
ssdsupport.stlin releases) - 3 Ø3mm hole 2.4mm thick spacers (use
spacer_3x2.4mm.stlfor 3D-print)
TODO: assembly instructions
assets
various files are placed in the assets to use in an assembly composition. for example, you'll find a 4.3inch display, raspberry pi 4 and a heatsink in there.
when creating a design assembly, make a new std part group and import desired assets into it. if an asset is in a freecad file format, open the file and drag&drop the top level object into the newly created std part. then close the original file ignoring the changes.